How to Use Internal Block Diagrams in SysML
SysML Internal Block Diagrams Explained: Ports, Flows, and Simulation
The internal block diagram (IBD) is one of the most important structural diagrams in SysML. It shows how the parts of a system are connected, how information or energy flows between them, and how subsystem interactions can be modeled in a way that supports both architecture understanding and simulation.
In this tutorial, we will walk through what a SysML internal block diagram is, how it relates to the block definition diagram, and how to use it effectively with examples such as an iPhone charging system and a toaster.
We will also cover more advanced topics like:
-
ports and connectors
-
signal flows
-
white box ICD tables
-
reference vs part properties
-
proxy ports vs full ports
-
nested internal block diagrams
-
autowiring and delegate ports
-
connecting structure to behavior for simulation
Watch the full video here:
https://www.youtube.com/watch?v=A4U0M6cxrQQ
What Is an Internal Block Diagram in SysML?
A SysML internal block diagram shows the internal structure of a block by displaying:
-
part properties
-
ports
-
connectors
-
internal flows
If the block definition diagram (BDD) tells you what the system is made of, the internal block diagram (IBD) shows how those parts are interconnected.
That makes the IBD one of the best tools for understanding:
-
subsystem interactions
-
interface design
-
flow paths
-
internal architecture
Internal Block Diagram vs Block Definition Diagram
Before creating an internal block diagram, you typically need a block definition diagram.
The block definition diagram defines:
-
the system structure
-
the blocks in the model
-
composition relationships
-
ownership hierarchy
Once that structure exists, you can create an internal block diagram to show how those parts connect and exchange flows.
A good way to think about it is:
-
BDD = what exists
-
IBD = how it connects
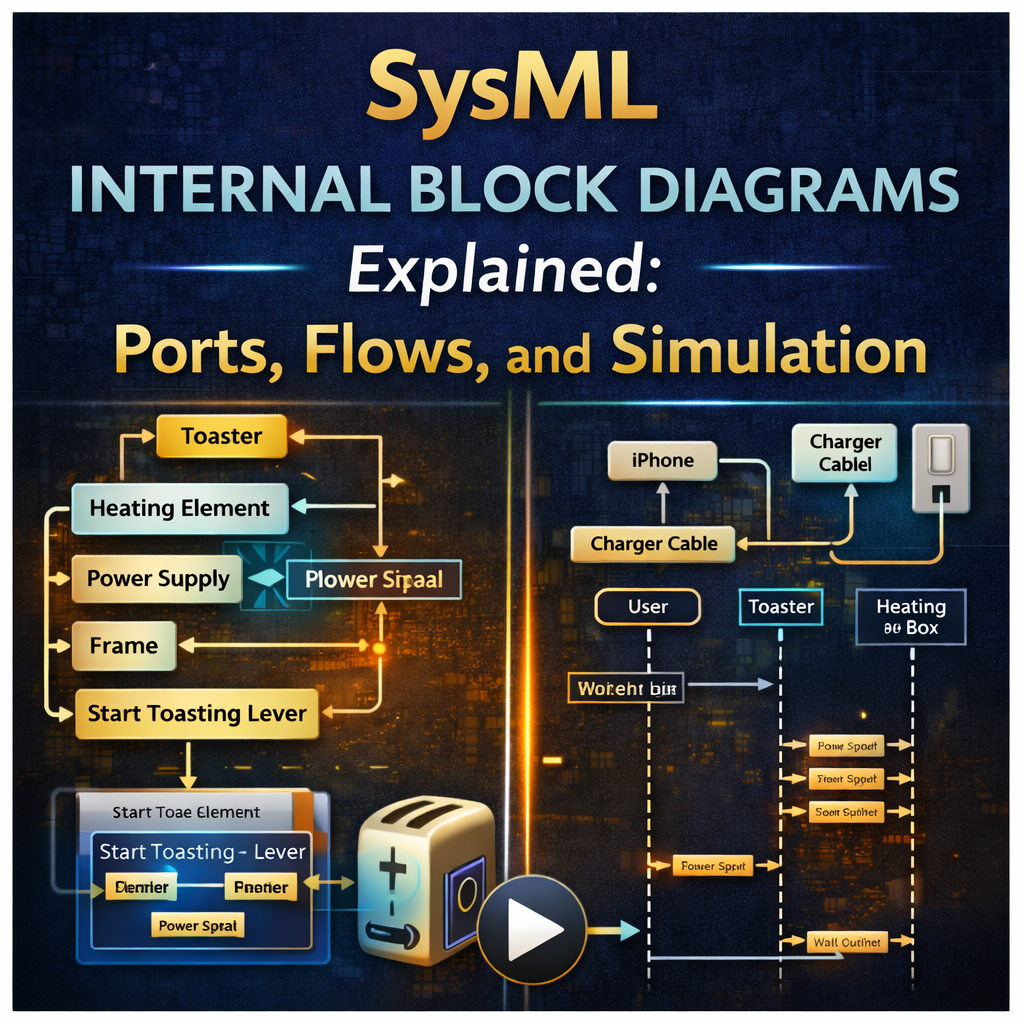
Example 1: iPhone Charging System Internal Block Diagram
A simple and intuitive example is an iPhone charging system.
In the block definition diagram, the charging context includes elements such as:
-
iPhone
-
charger cable
-
charger box
-
wall outlet
Once those are defined, you can create an internal block diagram for the charging context to show how they are wired together.
This is where the model starts becoming much more useful, because now you can see the actual relationships between the system parts.
Multiple Internal Block Diagrams in the Same Context
One helpful point from the tutorial is that a single context can contain multiple internal block diagrams.
That is completely acceptable and often useful.
For example, you may want:
-
one zoomed-out IBD showing the overall system
-
several zoomed-in IBDs showing detailed connector views
This allows you to keep one diagram readable while still capturing detailed interface information elsewhere.
Using Hyperlinks to Navigate Between IBD Views
A useful modeling trick is adding hyperlinks between diagrams.
For example, on a higher-level internal block diagram, you can place a hyperlink on a connection or part so that double-clicking jumps to a more detailed IBD view.
This is especially helpful when:
-
the system has many connections
-
detailed connector views would clutter the main diagram
-
you want a clean high-level architecture with deeper drill-down views
This is a practical way to manage large system models.
Signal Flows in Internal Block Diagrams
One of the most powerful features of internal block diagrams is the ability to show signal flows across connectors.
In the example, signals are defined in a signal package and then assigned to connectors with directionality.
This allows the internal block diagram to show not just that two elements are connected, but also:
-
what is flowing
-
in which direction
-
across which connector
You can also toggle these flows on and off depending on how much detail you want to show.
This makes IBDs especially valuable for modeling:
-
power distribution
-
command/data exchange
-
physical connections
-
interface behavior
White Box ICD Tables
Another very useful feature discussed in the video is the white box ICD table.
This table automatically tabulates the connections shown on the internal block diagram, including:
-
connector-level connections
-
pinout-level connections
This is helpful because it gives you a structured interface control document view directly from the model.
Instead of manually documenting all interconnections, the white box ICD table can summarize them automatically.
That makes it valuable for:
-
interface reviews
-
verification planning
-
systems engineering documentation
Connector-Level vs Pinout-Level Connections
The tutorial also explains the difference between:
-
connector-level views
-
pinout-level views
A connector-level row describes the connection at a higher level, while pinout-level rows show more granular detail inside the connector.
Whether you show both levels depends on modeling preference and the amount of interface detail you need.
In many cases, teams choose based on:
-
audience
-
engineering need
-
desired diagram clarity
Part Properties vs Reference Properties
A key modeling distinction in internal block diagrams is the difference between:
-
part properties
-
reference properties
Part Properties
Part properties are shown with solid outlines and represent owned parts of the system.
Reference Properties
Reference properties are shown with dotted outlines and represent references rather than owned composition.
This distinction matters because it changes the architectural meaning of the relationship.
Understanding this difference is important when modeling:
-
actual system composition
-
reused external elements
-
referenced resources or context objects
Proxy Ports vs Full Ports
The tutorial mainly uses proxy ports, but it also briefly notes the difference between proxy ports and full ports.
Proxy Ports
-
typed by interface blocks
Full Ports
-
typed by blocks
This distinction is important in SysML because it affects how interfaces are represented and how internal structure is exposed.
Even though the full proxy-port discussion is covered more deeply elsewhere, it is important to remember that the choice influences how the IBD behaves and how interfaces are typed.
Modeling Different Levels of Abstraction
The video also shows how internal block diagrams support multiple abstraction tiers.
For example:
-
a toaster exists inside a kitchen
-
the kitchen exists inside a house
-
the toaster itself contains internal subsystems
This is one of the most powerful uses of IBDs: they help you model both:
-
the white box view of what is inside a system
-
the black box view of how that system appears in a larger context
Toaster Example: White Box vs Black Box Views
In the toaster example, the toaster has internal parts such as:
-
heating element
-
power supply
-
frame
-
complete circuit
-
start toasting lever
Inside the toaster context, the internal block diagram shows these parts and their internal relationships.
At the kitchen level, the toaster is shown as a black box interacting with external elements like:
-
bread
-
power source
This distinction is very important in SysML:
-
white box = shows what is inside the system
-
black box = shows only what enters and leaves the system
Nested Internal Block Diagrams
The tutorial also shows how you can “zoom in” from a higher-level system to a lower-level system using nested internal block diagrams.
For example:
-
from kitchen view
-
into toaster view
This is useful because it allows you to navigate between abstraction levels without losing architectural continuity.
It also helps maintain a consistent system hierarchy across the model.
Dot Notation and Shortcut Representation
Another important technique shown is dot notation.
This is used when a nested part is shown in another context as a shortcut.
For example:
toaster.completeCircuit
This tells you that the part belongs inside the toaster but is being displayed in the larger context for convenience.
This is very useful for keeping diagrams readable while still showing important nested elements.
It also helps prevent accidental ownership mistakes.
Autowire Parts in Internal Block Diagrams
A particularly practical Cameo feature demonstrated in the tutorial is Autowire Parts.
When ports are already typed correctly, the tool can automatically generate connectors between matching ports.
This can save a lot of time when building complex internal block diagrams.
A few key points:
-
the ports must already be typed
-
matching interfaces are required
-
auto-created connectors should be reviewed and confirmed
This feature is helpful, but it still requires engineering judgment to ensure the suggested connections are correct.
Delegate Ports
Another useful feature is Delegate Ports.
If you create a connection from an internal part outward toward an external element, Cameo can automatically create a delegate port that carries the interface through the containing block boundary.
This is a powerful shortcut when modeling system interfaces because it avoids manually creating each intermediate port.
Delegate ports are especially useful when you want to expose an internal subsystem interface at the system boundary.
Flow Properties and Interface Compatibility
Before simulation can work correctly, the interfaces need flow properties.
In the tutorial, flow properties are added to interface blocks and typed by signals such as:
-
power signal
-
heat signal
This allows the model to validate compatibility.
For example:
-
if a wire interface expects a power signal
-
but you assign it a heat signal
the model will flag the connection as incompatible.
That compatibility feedback is one of the strongest reasons to formalize interfaces properly in SysML.
Flow Direction Matters
Flow properties can be defined as:
-
in
-
out
-
inout
Direction affects compatibility and determines whether the flow is logically valid across the connector.
If the direction is reversed incorrectly, the model can detect that incompatibility.
This makes flow properties very useful for catching interface mistakes early.
Connecting Structure to Behavior
The tutorial then moves beyond static structure and shows how to connect the internal block diagram to behavior.
For example, an activity diagram is created for the power supply so that when it receives power through one port, it sends power out through another port.
This is an important concept because it shows how SysML can combine:
-
structural modeling
-
interface modeling
-
executable behavior
Once a part has a classifier behavior, it can participate directly in simulation.
Simulating the Internal Block Diagram
When behaviors are assigned to the relevant parts, the internal block diagram becomes executable.
In the toaster example:
-
the power supply receives power
-
the signal cascades through connected parts
-
multiple activities start based on classifier behaviors
This allows the engineer to simulate how flows move through the architecture.
That is one of the most powerful uses of IBDs in Cameo: moving from a static wiring view to an executable system model.
Automatically Creating a Sequence Diagram
One especially useful capability shown in the video is automatically generating a sequence diagram from the simulation.
When the user triggers the power command, Cameo can produce a sequence diagram showing the chain of events across the system.
This is valuable because it links:
-
structural architecture
-
simulated execution
-
interaction view generation
That can save a lot of effort during analysis and documentation.
Best Practices for SysML Internal Block Diagrams
Based on the tutorial, here are several practical best practices.
Start with a strong BDD
A good internal block diagram depends on a good structural definition first.
Use multiple IBD views when needed
Do not overload one diagram. Use high-level and detailed views together.
Use hyperlinks for navigation
They make complex models easier to explore.
Formalize ports and flows
Typed interfaces and flow properties improve correctness and simulation value.
Leverage tooling features
Autowire parts, delegate ports, and white box ICD tables can save a lot of time.
Connect structure to behavior
That is where the model becomes truly powerful.
Final Thoughts
The SysML internal block diagram is much more than just a wiring picture. It is one of the core tools for representing how parts of a system interact, what flows between them, and how subsystems connect across multiple levels of abstraction.
In this tutorial, we covered:
-
what internal block diagrams are
-
how they relate to block definition diagrams
-
how to model ports, connectors, and flows
-
how to use white box ICD tables
-
how to work with nested views, dot notation, autowiring, and delegate ports
-
how to connect structure to behavior and run simulations
If you want to build stronger SysML models in Cameo, mastering the internal block diagram is essential.
Watch the full tutorial here:
Hi there! Do you know if they make any plugins to safeguard against hackers?
I’m kinda paranoid about losing everything I’ve worked hard
on. Any suggestions?
Your concern is totally valid — especially when working with complex models and sensitive system data in tools like Cameo Systems Modeler or MagicDraw. While there’s no single “anti-hacking plugin,” there are several important safeguards you can put in place:
1. Secure Your Local Files
Use version control: Cameo integrates with Teamwork Cloud (TWC), which acts like a secure Git-style system for your models.
Regular backups: Always enable auto-backup in Options > Environment > Backup. Save copies of .mdzip files to a secure cloud folder or external drive.
Encrypt sensitive files: Use tools like VeraCrypt or BitLocker if you store files locally and are concerned about theft or loss.
2. Protect Against Network Threats (for Teamwork Cloud users)
If you’re collaborating on a shared server:
Enable SSL/TLS encryption in your Teamwork Cloud configuration.
Use strong passwords and access roles via the Admin portal.
Whitelist IPs and restrict external access.
Update your Teamwork Cloud and plugins regularly to patch vulnerabilities.
3. Are There Security Plugins?
While MagicDraw/Cameo doesn’t offer “anti-hacking plugins” directly, it relies on your system security and network architecture. However:
JetBrains TeamCity and LDAP integration plugins can help manage user authentication securely in enterprise environments.
Some organizations build custom plugins to enforce file integrity or model access restrictions — but that’s advanced use.
Final Tips
Keep your OS, Java Runtime, and Cameo up to date.
Use a password manager to protect your credentials.
Enable cloud backups if you’re using Dropbox, OneDrive, or Google Drive.
If you’re really concerned: work on an offline machine, back up often, and scan for malware weekly.